Three device types for construction jobsites
The second distinction is between passive and active designs. Passive devices store and release energy through springs, elastic elements or gas dampers, so they need no battery or motor. They are light, quick to put on and fairly simple to maintain, which suits a site where kit gets carried between floors and trades. Active devices add motors and sensors, so support can be adjusted or switched on in response to movement. That can help with heavier or more variable loads, but it also means batteries, charging routines and more components to look after.
For most trials on a building site, passive designs are the usual starting point, because they are the easier format to introduce to a crew. Even so, the right choice depends on the task, not the technology label. A shoulder device that works well for ceiling drilling will do little for someone lifting plasterboard all day, and a back device won't relieve a plumber working overhead.
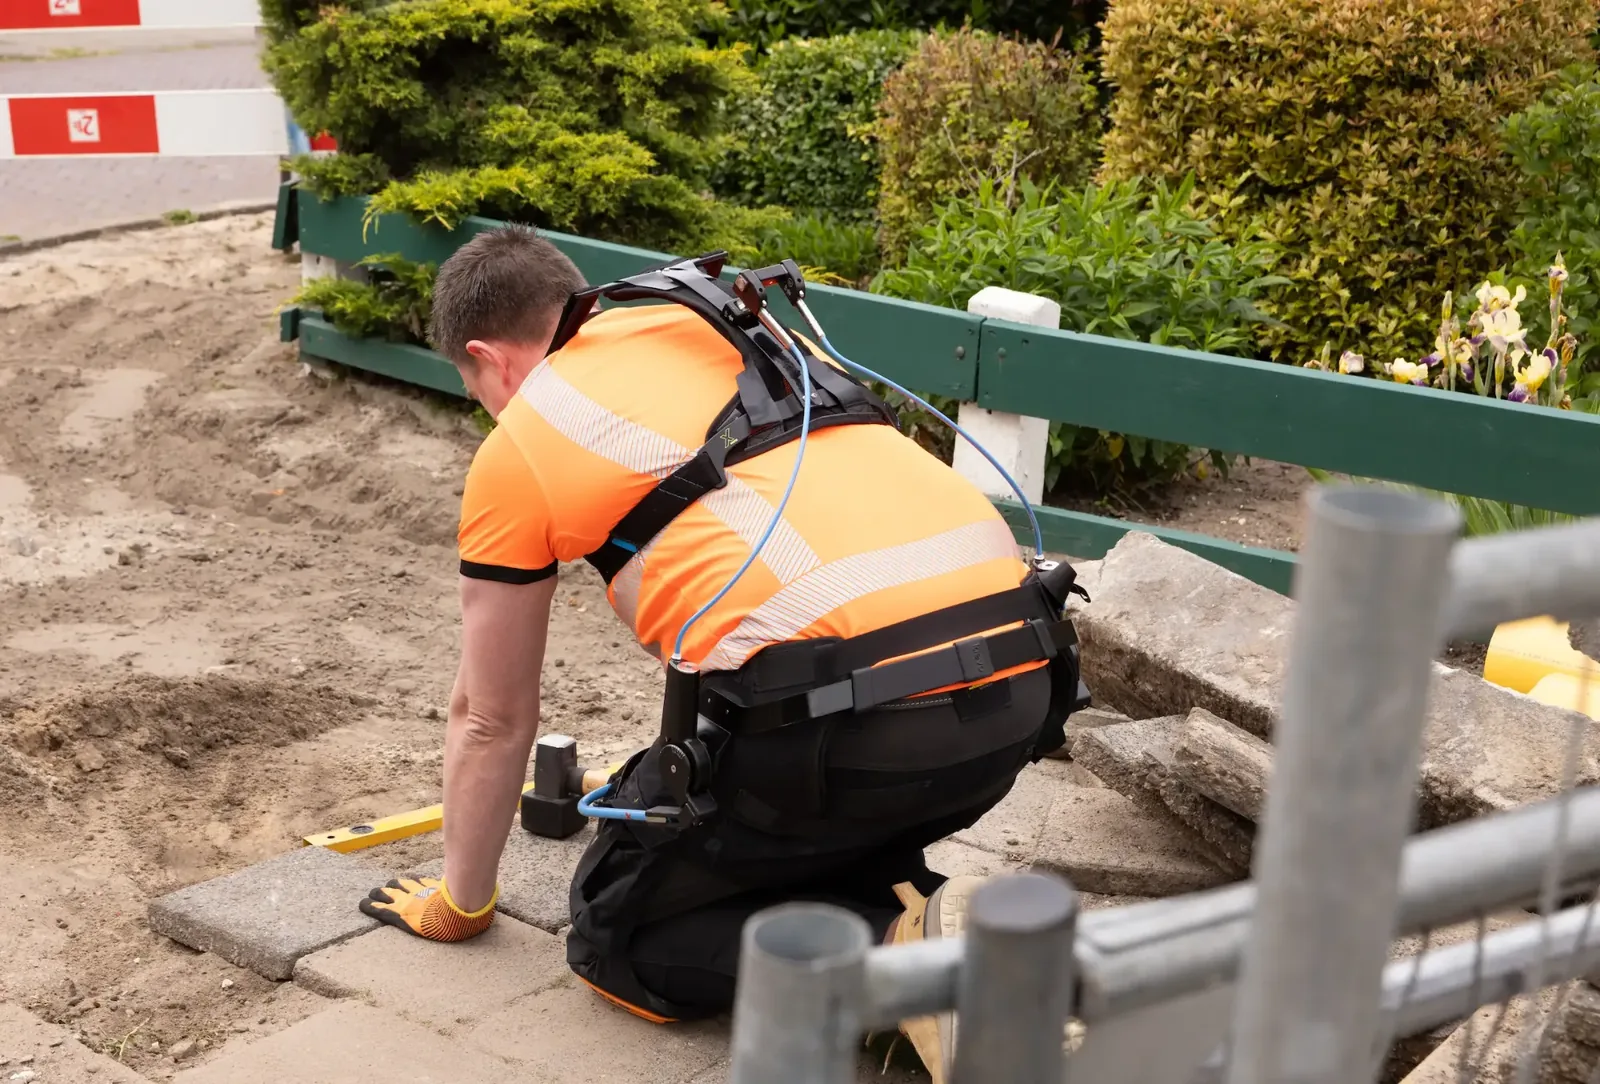
Ryggo lists exoskeletons for back and shoulder support. You can browse them on the exoskeletons page and compare them side by side, including models such as the Laevo Flex for back support and the Skelex 360 for shoulder support. If you'd rather start from your own tasks, the Exoskeleton Advisor recommends devices based on how your operation actually runs.
What the early evidence shows on fatigue, MSD risk and the ageing workforce
The evidence base for the exoskeleton for construction workers is still young, so it's worth being clear about what it does and doesn't show. The most recent field study comes from Texas A&M. Among 16 construction workers, a passive lower-back exoskeleton reduced fatigue by 37% and improved hazard-recognition performance by 29% during three-hour work sessions, according to the university's report. Participants did their normal work with and without the device. The sample is small and the setting American, so treat it as an early signal rather than a benchmark for a European site. The same findings are summarised on TechXplore.
What makes that study interesting is the link between fatigue and attention. A less tired worker may spot hazards better as well as carry less strain in the body. That's a hypothesis for your own site to test, not a promise.
The wider context explains the growing interest. Musculoskeletal disorders are a major burden across Europe, and construction, with its manual handling, overhead tasks and awkward postures, sits squarely inside that problem.
Reviews of passive devices describe the concept as still relatively new among SMEs and construction firms. A Delphi study on adoption identifies potential for reducing work-related musculoskeletal disorders, alongside barriers to uptake. A further evaluation of passive exoskeletons offers recommendations for design improvements, which tells you the products are still evolving.
On the ageing workforce, the logic is simple: if physically demanding tasks become less punishing, experienced workers may stay in the trade longer. The same Delphi study suggests exoskeletons may ease the labour shortage the industry faces. Test that in your own trial by tracking strain and willingness to keep using the device. Don't assume it.
Ready to find the right device for your operation?
Matching the device to the task: overhead drilling, carrying, kneeling and bricklaying
Matching the device to the task is the most useful decision you can make before a trial, and it's where many pilots go wrong. Start from the posture and load pattern of the job, not from a product brochure.
Overhead drilling and fastening. Holding the arms above shoulder height for long periods loads the shoulders and neck. Shoulder-support exoskeletons are built for exactly this, using a spring or elastic mechanism to carry part of the arm's weight. Ceiling anchors, services installation and facade work are the obvious candidates. Options on the platform include the Skelex Edge and Skelex 360.
Carrying and lifting. Moving materials, from bags of cement to plasterboard, puts repeated load through the lower back. A back-support device that assists hip extension during bending is the better fit. Look at back-focused models such as the Laevo V2 or the PES B, and check how each copes with the mix of bending and walking that carrying involves.
Kneeling and squatting. Flooring, tiling and low-level installation mean long periods in deep flexion. Lower-limb support suits this, but comfort matters a great deal because the device sits against the legs during awkward movement. Pay particular attention to fit and to freedom of movement on uneven ground.
Bricklaying. This is a mixed task: repeated bending to pick up a brick, lifting to placement height and a sustained forward lean. The back is often the main concern, though some crews also report shoulder load when working at height. A short trial that records which body area the crew finds most demanding will tell you more than guessing in advance.
A useful habit is to list the three most strenuous tasks for each trade, then rank them by how often they occur and how long they last. For an objective starting point, the free ergonomic analysis works from a 30-second video of the task and gives you a structured view of the postures involved, which helps you choose between a back device and a shoulder device.
Not sure which exoskeleton fits your task? Let the Ryggo advisor match it independently.
EU rules for buying: PPE classification, the Framework Directive and ergonomics standards
Regulation of occupational exoskeletons in Europe is still developing, and the EU-OSHA discussion paper on exoskeletons and OSH notes that there is no uniform regulation or certification covering exoskeletons across construction types. A foresight report from the EU North Sea Region describes regulation as being in its infancy. A buyer still has guidance to work with, but you should be deliberate.
The first question is classification. Where an exoskeleton is certified as personal protective equipment, the European PPE framework applies and the device can be used for protection. Not every exoskeleton is classed that way. Many are treated as work equipment or ergonomic aids instead. The paperwork you should expect from a supplier therefore depends on how the product is positioned, so ask the manufacturer plainly how the device is classified and what conformity documentation covers it.
The second anchor is the Framework Directive on health and safety at work (89/391/EEC). It puts the duty on the employer to assess risks and apply the hierarchy of prevention. In practice, an exoskeleton should sit alongside measures such as redesigning the task, using mechanical handling and improving layout, never in place of them. Treat the device as one control within a documented risk assessment, and record why it was chosen for a given task.
Third, ergonomics standards help you structure the evaluation. The same EU-OSHA discussion paper refers to human-centred design standards such as EN ISO 9241-210:2019, which supports involving users in assessing how a device fits and performs. That sits neatly with a trial in which the crew evaluates the equipment itself.
For procurement, ask suppliers for classification details, relevant test evidence and instructions for use, and keep the documents with your risk assessment. If a vendor quotes impressive figures, such as a percentage reduction in breaks or sick leave, ask for the method behind them. Your own trial data will carry more weight with your safety committee than any brochure.
Trialling on your own site: running a two, four or eight week test, defining success and winning crew buy-in
The most reliable way to judge an exoskeleton for construction workers is to try it on your own site, with your own crew, doing your own tasks. A device that looks excellent in a showroom can disappoint once it meets scaffolding, dust and a crew that moves between jobs. Deploy & Decide on Ryggo lets you trial any listed device for two, four or eight weeks, paying a test fee that is set out in advance. The how a trial works page walks through the steps, and our guide to try-before-you-buy programmes explains what to look for in any scheme.
Choose the duration to fit the question. Two weeks is enough to test basic fit, comfort and whether a device interferes with the task. Four weeks lets you watch habits form and catch problems that only appear after repeated use. Eight weeks suits sites with variable work, where you want to see the device across different phases of a project.
Define success before you start. Agree three or four measures with the crew and the safety lead: self-reported strain at the end of a shift, how often the device is actually worn, any task that becomes slower or harder, and absence or discomfort reports. Write them down so the result isn't argued over afterwards. Borrow the idea from the Texas A&M study of comparing the same work with and without the device, so you have a fair baseline.
Win crew buy-in early. Involve the people who will wear the device from day one, not after the decision is made. Let several workers try different sizes and settings, listen to what they dislike, and keep participation voluntary. Be honest that the aim is to reduce strain, not to track or replace anyone.
Avoid pilot purgatory. Set a decision date and a rule for what happens next: roll out, adjust and retest, or stop. Our guides on the cost of exoskeleton trials and the payback period help you turn the trial result into a business case. For the cost of buying outright after a successful trial, see pricing.
Find the right device before you trial anything
The Ryggo advisor maps your task, environment, and requirements to compatible devices — independently, across the full European market.